
Arthritis-Friendly Cooking Tips That Make Kitchen Tasks Easier
If chopping onions hurts your thumb joints or lifting a pot sends a sting through your wrist, the issue may be your setup, not your cooking skills. The best cooking tips for arthritis focus on reducing grip force, awkward wrist angles, and unnecessary lifting.
That means changing the way you prep, cook, and store food. Small shifts—like keeping tools at waist height, using a jar opener, or switching to one-pan meals—can cut pain fast. The goal is simple: make the kitchen work for your joints, not against them.
Think of this as a practical, everyday guide, not medical advice. You’ll get real-world shortcuts, tool picks, workflow fixes, and meal strategies that actually hold up on a bad day. Some are cheap. Some are worth every penny.
Start with the pain points that actually interrupt cooking
Featured snippet answer: Cooking with arthritis is easier when you reduce gripping, bending, and lifting. Use lightweight tools, jar openers, non-slip mats, pre-cut ingredients, and seated prep when needed. Keep frequently used items at waist height, choose one-pan meals, and pace tasks to protect painful joints.
The 5 kitchen tasks most likely to trigger arthritis flare-ups
The biggest troublemakers are jar lids, repetitive chopping, heavy cookware, long stirring, and standing too long at the counter. Those tasks combine grip force, wrist deviation, pinch strength, and load-bearing in one ugly package.
- Jar lids: high twisting force, often 15 to 30 lb of torque for stubborn lids.
- Box grating: repetitive pinch and knuckle pressure, especially on hard cheese or carrots.
- Heavy pots: Dutch ovens can weigh 8 to 15 lb empty before food is added.
- Slippery knives: thin handles force a tighter grip and more thumb strain.
- Long stirring: 5 to 15 minutes of repeated wrist motion can flare up already irritated joints.
Forum-style advice from home cooks with arthritis is blunt: it’s rarely one “big” task that ruins dinner. It’s the little stuff repeated ten times. That changes everything.
Why “faster” cooking is not always easier
Fast recipes only help if they reduce total joint work. A shortcut that saves 10 minutes but forces extra chopping, more transfers, and a sink full of pans can feel worse than a slower method with less strain.
Here’s the trade-off in plain English: pre-cut vegetables cost more, but they save grip time and knife work. Frozen vegetables cut prep even more. Meal kits reduce planning, yet they often add packaging and extra steps. Batch prep can be smart, but only if you stop before your hands start complaining.
Build an arthritis-friendly kitchen layout before you change recipes
The fastest upgrade is not a new recipe. It’s moving the things you use most to the places your joints can reach without pain.
Put the most-used items between hip and shoulder height
Keep daily items in the reach zone from about 30 to 60 inches off the floor. That range reduces shoulder lift, deep bending, and awkward wrist angles. High shelves and floor-level cabinets are where pain goes to multiply.
| Kitchen zone | Best use | Joint impact |
|---|---|---|
| Hip to shoulder height | Everyday pans, bowls, utensils, spices | Lowest strain |
| Above shoulder height | Rarely used holiday items | Higher shoulder and grip strain |
| Below knee height | Bulk storage, backup appliances | High bend and squat load |
If you have to choose, use drawers over deep cabinets. Pull-out storage beats kneeling and fishing around in the dark every time.
Swap in tools that reduce force, not just effort
Good arthritis tools lower the amount of force your hands need to generate. That means thicker handles, lighter pans, and powered helpers for twisting or cutting tasks.
- Handle diameter: 1 to 1.5 inches is often easier to hold than skinny metal handles.
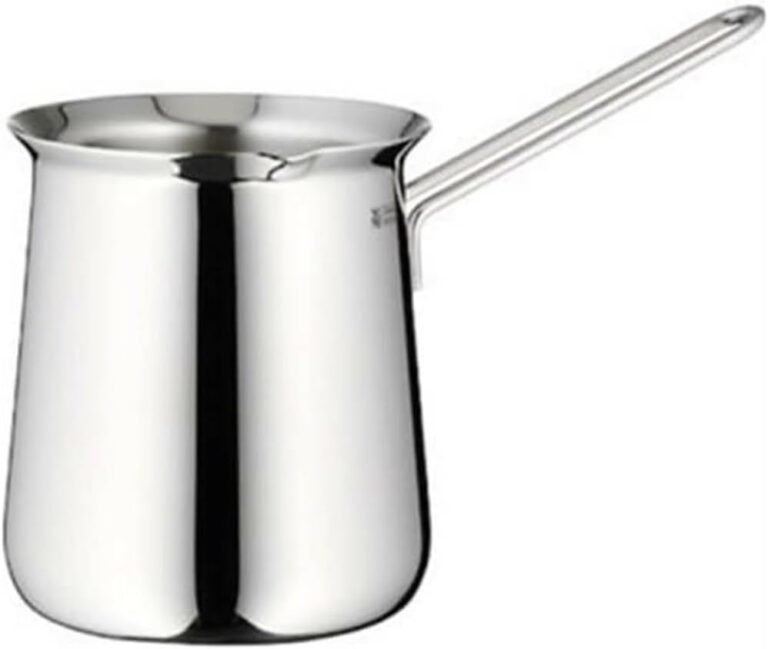
- Cookware weight: lightweight stainless or aluminum-clad pans are easier than cast iron for daily use.
- Electric can opener: removes the repeated wrist twist that manual openers demand.
- Rocker knife: lets you chop with a rocking motion instead of a hard downward press.
- Spring-loaded scissors: useful for herbs, packaging, and trimming chicken.
If you’re comparing upgrades, the best kitchen gadgets for elderly often overlap with the most useful arthritis tools because both groups benefit from less grip force, simpler controls, and safer handling. The right gadget is not flashy. It just removes one painful motion.
The non-slip setup that prevents “small” pain from becoming big pain
Stability matters more than speed on a painful day. A cutting board that slides, a bowl that spins, or a pan that skids can force your hands to clamp down harder than they should.
- Non-slip mat: place under cutting boards and mixing bowls.
- Damp towel: folded once or twice, it can stabilize lightweight bowls in a pinch.
- Suction base: works well for mandolines and some choppers.
- Textured board: better grip for wet produce and slippery proteins.
Choose recipes that match your hands on a bad day
The best arthritis-friendly recipes are low on transfers, low on lids, and low on cleanup. Sheet-pan meals, soups, casseroles, and rice bowls usually beat recipes with lots of separate components.
What “arthritis-friendly” means in real cooking terms
In practical terms, a joint-friendly recipe has fewer fine-motor steps, fewer heavy pots, and fewer times you have to lift, drain, or flip food. It should also tolerate substitutions without falling apart.
Think of it this way: if a recipe needs six bowls, three pans, and constant stirring, it is not a friendly recipe on a flare day. If it uses one pan and one spoon, that’s the kind of everyday win you want.
The best recipe patterns when joints are flaring
On high-pain days, the best recipes keep active cook time low and cleanup even lower. Here’s a practical comparison.
| Recipe pattern | Prep count | Cleanup load | Best for |
|---|---|---|---|
| Soup or chili | Low to medium | Low | Flare days |
| Sheet-pan dinner | Low | Very low | Busy weekdays |
| Rice bowl | Low | Low | Easy meal ideas |
| Breaded cutlets | High | High | Better hand days |
| Pastry or from-scratch dough | High | Medium to high | Not ideal on flare days |
For step-by-step formats, many people lean on recipes how-tos, recipes guides, and visual how-tos videos because seeing the motion matters. A clear demo can save your wrists from trial-and-error. That’s also why some home cooks prefer allrecipes recipes style layouts: straightforward steps, everyday ingredients, and quick substitutions.
When convenience foods are worth it
Convenience foods are worth it when they cut pain more than they add cost or sodium. Frozen chopped onions, pre-washed greens, rotisserie chicken, canned beans, and microwave rice can be a smart middle ground.
Use them strategically. A bagged salad plus rotisserie chicken can become dinner in 5 minutes. Frozen vegetables can replace 10 minutes of chopping. The trade-off is usually texture and sometimes salt, but on a painful day that is a fair exchange.
If you want more support choosing tools that make prep easier, the best kitchen gadgets for disabled people guide is a useful companion because many of the same adaptive features help people with arthritis: larger grips, easier controls, and lower-force operation.
Use cooking methods that reduce strain without making food bland
You do not need to sacrifice flavor to protect your joints. Some of the easiest methods are also some of the best for taste.
Low-effort techniques that preserve flavor
Roasting, steaming, braising, pressure cooking, and sheet-pan cooking reduce standing, stirring, and pot juggling. They also reward simple seasoning, which means you can do less hand work and still get a good result.
- Roasting: mostly hands-off once the pan goes in.
- Steaming: minimal stirring, fast cleanup.
- Braising: builds flavor with low active effort.
- Pressure cooking: shortens simmer time and reduces checking.
- Sheet-pan cooking: one tray, one transfer, one cleanup.
That’s the practical version of what you see in york times-style recipe guides: a clear method, a few good ingredients, and a finish that does not demand heroic effort.
What to do when stirring, draining, or flipping hurts
Use smaller batches, lighter pans, and helper tools before you force your way through pain. A 12-inch skillet loaded with food is harder to move than two smaller pans with half the volume each.
Try these swaps:
- Stirring hurts: use a silicone spatula with a thicker handle and shorter stirring intervals.
- Draining hurts: choose pasta shapes that cook in less water or use a pot insert.
- Flipping hurts: roast instead of pan-fry, or use a fish spatula with a broad edge.
Nonstick pans can help with flipping and cleanup, but they are not magic. They often trade away browning and durability. If you cook a lot of seared food, keep one nonstick pan for eggs and delicate items, not everything.
Make prep safer and less painful in under 10 minutes
You can cut a lot of strain in one short reset. The best setup is the one you can repeat before every meal without dreading it.
The “one board, one bowl, one knife” workflow
This workflow reduces transfers, washing, and grip changes. It is simple, and that is why it works.
- Set out one cutting board with a non-slip base.
- Place one medium bowl next to it for scraps or chopped food.
- Use one knife with a comfortable, thicker handle.
- Prep vegetables first, then proteins, then sauces.
- Keep the trash bowl close so you do not keep walking back and forth.
For onions, slice off the ends, peel once, and cut larger sections instead of tiny dice if the recipe allows it. For proteins, use kitchen scissors where possible. For vegetables, buy pre-trimmed versions on bad weeks. No shame in that.
Batch prep without overdoing it
Batch prep works best in 15-minute blocks with a hard stop. Longer sessions often turn into next-day pain, especially if you start feeling “fine” halfway through and keep pushing.
Use a timer. Rest your hands. Switch tasks before your joints stiffen. A good rule: if your grip starts weakening or your wrist starts feeling warm and tight, stop. That is your warning light.
Know when to modify the meal instead of forcing the method
Some recipes are worth adjusting. Some should be replaced outright. The trick is knowing the difference before you start.
Recipe substitutions that cut hand strain
Use substitutions that remove repetitive labor without wrecking the meal. The best ones are simple and predictable.
- Pre-shredded cheese: saves grating time, though it can melt a little less smoothly.
- Jarred sauce: cuts chopping and simmer time, but can add sodium.
- Canned beans: skip soaking and long cooking.
- Microwave rice: removes pot lifting and draining.
- Bagged salad: avoids washing, drying, and tearing greens by hand.
These are not moral failures. They are tools. Everyday cooking should fit your body, not punish it.
A simple decision rule for hard days
If a task requires strong grip, twisting, heat, and lifting, replace it. That is the quick self-check.
Example: opening a tight jar, stirring a thick sauce, and lifting a hot pot in one recipe is a bad combination for arthritic hands. Swap the jar for a squeeze bottle, the sauce for a simmer-and-pour version, or the pot for a skillet meal. One change can save the whole dinner.
What to avoid if your joints are already irritated
Some “helpful” habits backfire because they pile strain onto already sensitive joints. The pain usually shows up later, not while you are cooking.
The most common “helpful” habits that backfire
Heavy cast iron, tight jar lids, wet slippery handles, long standing prep, and oversized knives are the usual suspects. They seem manageable in the moment and miserable an hour later.
People in cooking forums say the same thing over and over: the pain comes from repetition, not drama. A little extra force at every step adds up fast. That’s the trap.
Warning signs you should stop and switch tasks
Stop and change the plan if you notice swelling, loss of grip, burning pain, numbness, or fatigue that lasts into the next day. Those are not “push through it” signals.
If your hands start shaking because you are compensating for pain, switch to a no-cut meal, a prepared ingredient, or a seated task. Cooking should not cost you the rest of the day.
If storage is part of the problem, this guide on how to store kitchen gadgets in a small kitchen can help keep adaptive tools within easy reach instead of buried in a hard-to-open cabinet. That matters more than people think.
Quick-start checklist for the next meal
Use this reset before your next dinner. It takes minutes, not an afternoon.
7-item arthritis-friendly kitchen reset
- Jar opener: keep it in the top drawer.
- Non-slip mat: use under boards and bowls.
- Lightweight pan: choose one you can lift with one hand.
- Seated stool: use for prep, not just resting.
- Pre-cut ingredients: buy them for flare days.
- Easy-grip utensils: thicker handles beat thin metal.
- Timer: pace yourself and stop before overdoing it.
Want a simple rule of thumb? If an item is used every day, it should be easy to reach and easy to hold. If it is hard to reach, it will not get used. That is how kitchens quietly become painful.
Good day vs bad day: what to cook and how to cook it
This is the decision framework most people actually need. It keeps you from treating every day like a high-energy day.
| Day type | Best meal style | Best tools | Avoid |
|---|---|---|---|
| Good day | Batch prep, roasted vegetables, grain bowls | Knife, board, sheet pan | Nothing major, but pace yourself |
| Moderate day | One-pot pasta, skillet meals, soups | Light pan, spatula, jar opener | Long stirring and heavy lifting |
| Bad day | Rotisserie chicken, frozen vegetables, microwave rice | Electric opener, stool, non-slip mat | Chopping, draining, and multi-pan cooking |
If you want more visual examples and adaptable meal formats, the broader recipes guides and how-tos videos ecosystem can be helpful, especially for people who learn better by watching than by reading. That’s the same reason easy, everyday meal ideas do so well online: they reduce decision fatigue.
People Also Ask: arthritis cooking questions answered
These are the questions people ask most often when they want practical help, not theory.
What are the easiest foods to cook with arthritis?
The easiest foods are one-pan, one-pot, or no-cook meals that need little chopping and little stirring. Soup, chili, rice bowls, sheet-pan chicken and vegetables, scrambled eggs, and rotisserie chicken meals are usually the least painful options.
How do I reduce hand pain while cooking?
Reduce hand pain by using thicker-handled utensils, opening jars with a tool, stabilizing cutting boards, keeping items at waist height, and choosing recipes with fewer steps. Seated prep and smaller cookware also help a lot.
Are electric kitchen gadgets worth it for arthritis?
Yes, if they remove a repeated painful motion. Electric can openers, hand mixers, food choppers, and jar openers can be worth it because they cut twisting, squeezing, and gripping. Skip gadgets that add setup time without lowering strain.
Is cast iron bad for arthritis?
Cast iron is often a bad fit for arthritis because it is heavy and awkward to lift, especially when full. A lighter aluminum or stainless pan is usually easier on the hands, wrists, and shoulders.
What is the best way to prep vegetables with painful hands?
The best way is to reduce knife work. Use pre-cut vegetables when possible, choose softer produce, use a rocker knife or food chopper, and keep prep sessions short. If your hands are flaring, frozen vegetables are often the smartest choice.
Should I cook seated if standing hurts?
Yes. Seated prep can reduce fatigue and help you stay in the kitchen longer without pain. Use a sturdy stool, keep the work surface at a comfortable height, and place ingredients within easy reach so you do not twist or lean constantly.
What kitchen tools help most with arthritis?
The biggest wins usually come from a jar opener, non-slip mat, lightweight pan, electric can opener, rocker knife, and easy-grip utensils. If storage is tight, a guide on how to store kitchen gadgets in a small kitchen can help keep those tools accessible instead of buried.
For readers who want a broader shopping shortlist, the most useful next step is often a focused roundup of the best kitchen gadgets for elderly and the best kitchen gadgets for disabled people. Those guides line up well with arthritis needs because comfort, reach, and low-force use matter more than fancy features.